
Our Gardens
Our Gardens
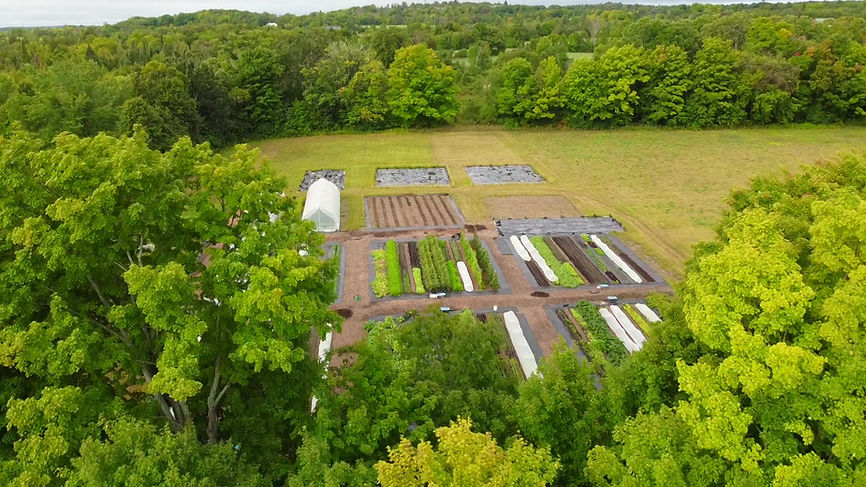
Our farm consists of a number of gardens.
We have a handful of pollinator gardens, seeded with flowers and other plants that are beneficial to insects, who in turn help us by pollinating our various flowering vegetables.
We have an experimental garden which we often refer to as the overflow garden. This is where we can test new and uncertain varieties and transplant whatever excess seedlings we may have started indoors. Since this garden isn't used for production, we're never in a hurry to remove plants to make way for another crop, making it much more ideal to use for seed saving.
Finally we have our primary garden. This is where we grow all of the veggies and herbs for our CSA shares, farmers market offerings, and food bank donations. This is where we spend the vast majority of our time and effort.
Garden Layout
Our primary garden is subdivided into sections we call blocks. Each block is further divided into beds. At any given time, a bed contains a specific crop, seeded and harvested together.
Since we label our blocks and number the beds within a block, we're able to use a standardized convention to refer to specific locations. For example: Today we need to harvest the Carrots in C8, or, the deer just made a buffet of F2!
Between the beds of each block are relatively narrow pathways that allow access for seeding, scouting, weeding, and harvesting. Between our blocks are much wider pathways that allow for freedom of movement and tractor or wheelbarrow access. These wide pathways give us a place to dump compost or woodchips before they are distributed, or to stage tools and materials for the other tasks.

Freshly Shaped Beds
This shows a new garden block in the process of being prepared. The beds have been measured, marked, and shaped.
At this stage compost has not yet been amended into the beds nor have wood-chips been added to the pathways.
As we clear a new block for planting, we take the many rocks we find and put them in the heavy duty bags seen in the background. We can then use these as weights to secure tarps and other items against strong wind.
Fertilizer and Pest Management
Fertilizers
Seeds that we start indoors are grown in a medium of peat moss and perlite. Perlite is lightweight rock that's added to the medium to resist compacting and improve drainage. We amend this medium with an all-purpose organic fertilizer sourced from Gaia Green.
Outdoors in our gardens, we amend our beds with compost sourced from a mushroom farm nearby. We also add "multipurpose organic hen manure" as a light fertilizer that we source from Acti-Sol.
This season we'll also be testing out a certified organic liquid fertilizer that's created by processing recovered food waste - a great way to further close that loop.
Pest Management
Our most troublesome pests in the garden are insects, specifically: flea beetles, cucumber beetles, tomato hornworms, and squash vine borers. To deal with them we employ a variety of techniques such as: insect nets, sticky traps, diatomaceous earth, and manual removal (especially with hornworms). In cases of severe trouble, like once the cucumber beetles set up shop in our cucumber tunnel, we mix and spray with an insecticidal soap spray. This is created by diluting castile soap (a vegetable oil based soap) in water. The spray kills the hard shelled beetles without affecting the plants. We source our castile soap from Country Cupboard Health Foods in Fenelon Falls.

The diabolical cucumber beetle.
Weed Control
All weed removal is either done manually (by hand, with a hoe, etc), or with a flame weeder, where we burn away weeds before seeding a bed.
We also take preventative steps to address weed pressure by using large tarps to cover and black out beds prior to seeding. These tarps warm the ground, encouraging dormant seeds to germinate, and then without being able to find light, they eventually die. This method takes weeks and requires forethought, but it's both safe and effective.
For plants that we transplant outdoors, like tomatoes, cucumbers, kale, we also make use of landscape fabric to cover the seedbed to prevent weed growth. Holes are cut or burned into the fabric at the intended spacing so we're able to transplant the crops of interest while leaving very little room for the weeds to grow.


Irrigation
When there's too much rain, the combination of our raised beds and sunken pathways allow for excess water to drain away from our crops. But when there's too little or inconsistent rain, our irrigation system picks up the slack and saves us a bunch of labor.
Such Automation, Very compute
Our system is automated and controlled by a small computer. The computer is connected to a network of valves which it opens and closes to guide where and when the water flows. The computer can also talk to our weather station, and skip irrigation cycles if there's been sufficient rain.
Since we grow a variety of crops with very different watering preferences, our system is designed to allow for crop-specific irrigation programs on a per-bed basis. Lettuce growing in one bed may receive a total of 1 inch per week, spread evenly over 7 days. In the bed beside it, Zucchini may get 1.5 inches per week, but applied in just two waterings.

A partially assembled irrigation manifold. The 5 gray valves will be wired to and controlled by our computer.
It's a good thing.
Drip, Drip, Drip
Once the computer, valves, and piping get the water to the right bed, we use drip tape to actually apply the water. Drip irrigation is slow but significantly more water efficient than overhead watering. There's effectively no runoff or loss due to inaccuracy, every drop makes to where it should be.
Once the computer, valves, and piping get the water to the right bed, we use drip tape to actually apply the water. Drip irrigation is slow but significantly more water efficient than overhead watering. There's effectively no runoff or loss due to inaccuracy, every drop makes to where it should be.
Drip also helps us reduce disease pressure. By keeping the plants as dry as possible, it helps mitigate problems like powdery mildew. Since we're a clean growing operation, thoughtful preventative measures like this are our best defense.

Drip tape running between rows in a bed of radish.


Depths of Winter
This winter we've been monitoring the high and low temperatures inside our caterpillar tunnels. These are simple, unheated structures covered with transparent plastic.
On a sunny day, the interior temperature is between about 20-25C higher than outside.
At night the interior temperature can drop below freezing, but not by much.
Season Extension
Where we are in the Kawartha Lakes, our frost freeze growing season is about 130 days long. Our planning expects a last frost date of May 15th, and a first frost date in the fall around September 20th.
In order to get an early start and a late finish on some long growing and favorite crops, we've made use of caterpillar tunnels. One tunnel can house several hundred tomato plants and steel trellis support lines help them grow straight upwards. Other crops we grow exclusively in tunnels are cucumbers and peppers.
The tunnels let us transplant these crops out to the field much earlier than local temperatures would ordinarily allow, and we can keep them quite a bit later too.

Tomatoes growing inside a caterpillar tunnel. The sides of the tunnel are raised for ventilation, cooling, and to allow pollinators access to the flowers.